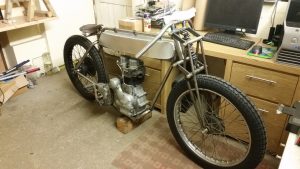
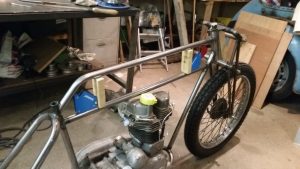
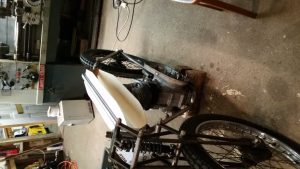
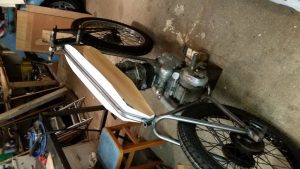
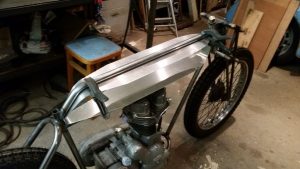
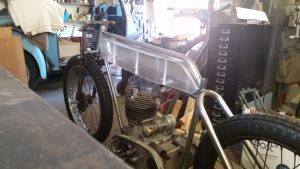
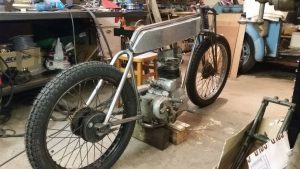
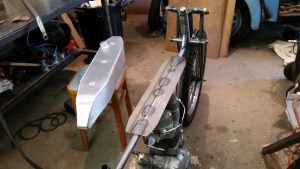
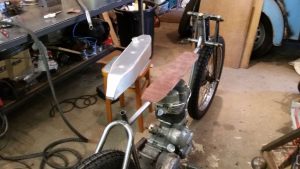
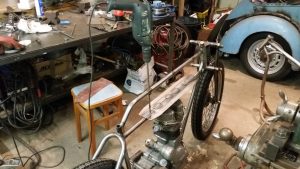
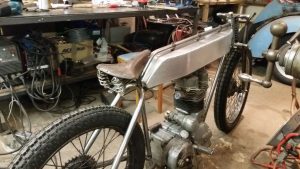
That’s it …………. Mac has to work til 5am the morning of the bike show (tomorrow) – so this’ll have to do!
Far from finished but it can go as a static display alongside his XS, Sarah’s V50 and Heisenburgs collection of weird and wonderful exotica!! (keep watching – we’ve been so busy we’ve let the posts slip)
Tonight a little slice of history was made, OK when I say little I may be blowing things out of proportion a touch, never the less the Enfield has taken it’s first breath of 14/1 for a great deal of time, I don’t know when it was last started but I’ll make an educated guess that this was laid up 30+ years ago maybe a lot more, who knows.
I’ve been tinkering with this trying to get it started for a week or so but no joy, just a few pop’s and bangs to keep me interested, the clock is ticking and the Brackley bike show is now only a month away so I asked for a little help from Cooper, he’s a pain in the arse really, he has the midas touch…. just as I expected after me trying for a week he got it going in 5 minutes, bigger battery to make a better spark and force more fuel in to the carb as it’s not filling correctly, few kicks and off she went, back in to life after a very long sleep.
Need to make up a racing exhaust now…
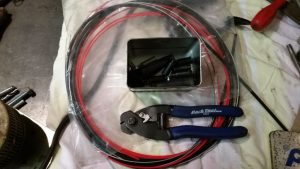
Well.., popped round to Mac’s tonight to borrow a cable making kit for my new internal throttle, trying to keep the cables well tucked away this time.
I should probably stop fannying about with such luxuries but I like the idea of a clean front end, I would like inverted levers too but I have hit a little snag, you can’t have both as the cables need to run the same path….Bugger…. So what now, a quick Google and the forums are saying the same thing, you can’t have both although there is a company called Cooke engineering that will make you the kit for the princely sum of 600 bucks, that’s 600 more than I am willing to pay so I need another solution, quite a bit of head scratching later I have a rough plan, I’ll just offset the cable for the throttle and run the brake to the side, i realise it will need to be inside the outer or we will get snags so lets crack on.
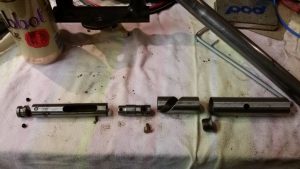
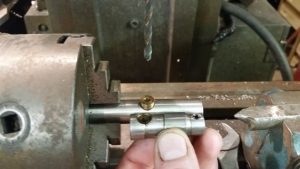
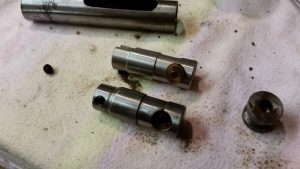
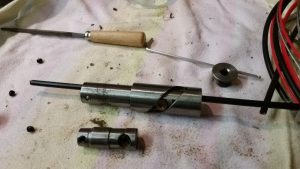
This is the internal assembly as I got it.
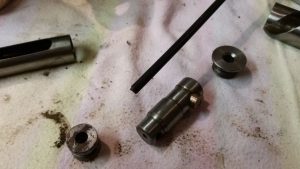
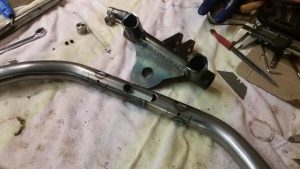
The problem part is the slider, well and both end plugs but they are easy to fix, you can see the cable we need to hide inside this part without interfering with the normal oporation of the slider.
Make a new one is the answer.
I drilled a 4mm hole for the pin and a 10mm pocked for the roller.
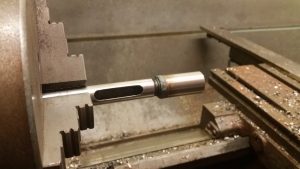
Added a slot to hide the cable, quite a bit bigger than the cable so I can add a lot of grease, any snagging here will be felt in the throttle.
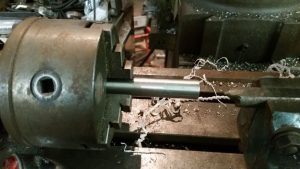
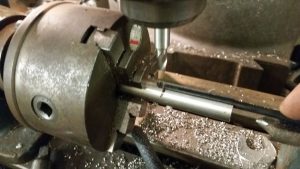
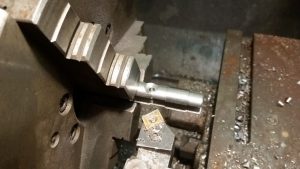
Pop it in the lathe and make relief cuts to keep the friction down, keep it simple.
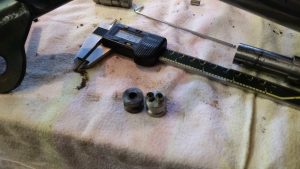
Almost done, as you can see I have added a slot and moved the grub screw 90 degrees so the offset for the pinch hole for the end of the throttle cable wont interfere with the brake cable.
It’s running nice and smooth even with the cable running through it, should be able to finish it tomorrow, I’ll report back then.
Few more pictures to add, first one shows the new end plate, this retains the end of the throttle cable but allows the front brake to go straight through, it all look’s like I’ve made it on the wonk but I was trying to keep the throttle as close to the middle and the brake as close to the side.
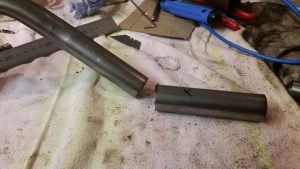
Chop, chop… off goes the now spare part of the handlebar!
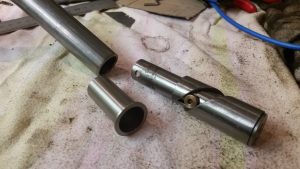
Bit of a problem as now the outside of the assembly does not fit in the tube very well, it’s a bit sloppy, well very sloppy so I have made a collar to take up all the slack.
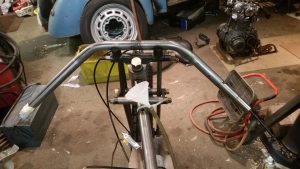
I needed a way to exit the cables in a tidy place, should have done this before I welded the handlebars to the risers, good job I only tacked it.
Next I needed to add something for the inverted lever to mount in to so I added some bar I hollowed out, thought I had better weld it in the lathe to keep it all straight, I used a rolling centre to hold it in place.
Dont look too bad assembled either, pretty tidy.
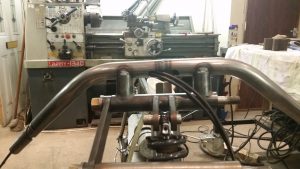
So this is both cables exiting the front of the handle bars , I think they look alright, one issue I may have is I am having to use a throttle sized cable for a front brake which is not ideal but a larger cable simply wont fit through the throttle assembly, I can have a full size clutch though so all is not lost, well other than the lack of front brakes….
Now waiting for the levers to turn up, I’ll report back!
Not a happy bunny…
Fitted the new shiny generator tonight to prepare for finally firing her up, we have a spark and I have checked the timing so we are good to go, quick check over the carb needed but not a big job, we can fire it up on wd40 straight down her throat.
I modified the original nut from the standard generator to fit the new ‘Sparx’ Unit and was awarded for my efforts with a little surprise, when you tighten the nut up the crank goes solid.. I’m a little far in to the build to be dealing with this kind of problem…GGRRRRR
Here’s what I found.
So as you can see there is something wrong, this amount of end float would be destructive so there’s only one thing for it, I’m going to buy another engine from India, they are really good and have electric start and….OK who am I kidding, you know me I’ll fix it, I have some really big hammers…!
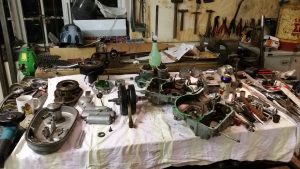
I didn’t enjoy ripping it apart again although I’m shocked how much crap was inside, all sorts of metal particles and guff, here it is in bits.
I’m really careful to organise parts so I don’t miss anything so I know everything I had was put back in the engine, the funny thing is that a spacer turned up the other week just after Mac visited, I’m not trying to point fingers at ‘captain Sabotage’ but we know he is very capable of underhanded tactics, I thought we were friends but it just goes to show you can’t trust anyone, my only action is to write a strongly worded letter to Scotland yard to demand JUSTICE.
Still waiting on the reply from Scotland yard, I know they must be busy so I’ll just sit tight, might try writing to Shaw Taylor, I doubt he’s doing much these days.
So tonight I started putting it all back together again, turns out the ‘returned’ spacer was a little worn, got the crank cases back together and still had play to the tune of 50 thou (1.2mm) so still to sloppy, I made a new spacer to the right size and tried again… it’s now a good fit, no side play at all so I’ve bolted the 2 cases together and fitted the timing wheels to now find out I have no idea how the points ignition aligns it’s self, I presumed it would just work but thinking about it i now need to figure this out.
No pictures tonight I’m afraid as my phone is out of battery so you will have to imagine a very bare engine sat on some wooded block perched on my bench, looking very sorry for it’s self but with no play in the crank!
Right, now we know this contraption is definitely going to be a board track racer and not some shandy swilling gentleman’s velocipede we can add another important component, the handlebars, nice and short, swept down and kept simple to withstand the tremendous forces that will be thrust upon them when I unleash the full ‘SEVENTEEN’ horsepower and rely on the structural integrity when I thrash this beast as speeds over ‘FIFTY MILES PER HOUR’, we need to get these right or I am ‘TOAST’.
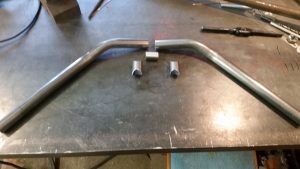
I had a good look on Google images to check out some styles and found that keep it simple looks good so I started bending some tubes and offering them up to the bike until I got an angle that looks right, made a little stub to go inside both tubes and a couple of standoff tubes to mount the handlebars, I went for the fixed position rather than adjustable to keep the appearance trim, I quite like it!
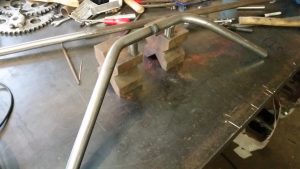
Welded it all up with my tig and the use of a couple of vee blocks, looks like I got it pretty straight.
Next I welded the bars to the top of the girders in the ‘full race’ position, I can imagine my thinner self laid over the tank ready to race, enjoying breathtaking acceleration up to fifty mph much quicker than most mopeds and bicycles.
I’m not planning on racing any mopeds just incase my calculations are wrong but in theory I should be able to beat them.
I have some grips on the way from China in the style of Coke bottles so I now need to decide on levers.
So it’s decided, it’s now going to be a board track racer, was going to be a ‘Gentlemans bike’ but as macs ‘Arley is looking sooo tasty we need to pull out the stops.
The main difference as I see it is Gentlemans motorcycles have comfortable handlebars to sit you in a distinguished position astride your propelled velocipede, board track racers lean you over your finely tuned machine in the racing position, this position cannot be rushed as your wedding tackle must be arranged correctly to avoid watering of the eyes, even before this machine has reached it’s first shake down ride I already am quite careful to mount corectly due to an experience I wont share…
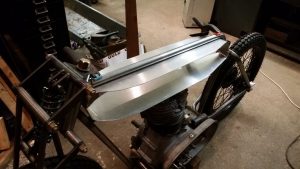
Now to build the petrol tank, this is my first so may not be the right way to do it but hey ho..
I needed to decide how high the gap would be to fit this contraption in so I used wood and magnets as I had these in front of me.
Now to work out the shape, I had a good look on google images to find a period shape and got the cardboard out and started cutting, very Blue Peter!
Got a shape I was happy with and transfered it to ‘Luminum..
The great thing is at this point you can just sit on the bike with an angle grinder with a flap wheel and just sculpt it to look just how you want it. I made the bends using a precision bending machine, I certainly diddn’t bend them over an old fire extinguisher using my knee..! Ok so I did, you dont need bending equipment, just use what you have but tell people you have fancy equipment.
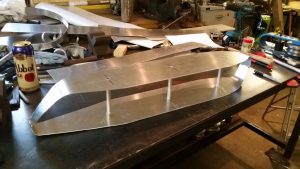
Traditionaly the tank is mounted using crappy mounts that look like conduit clips, I’m not keen so I came up with a plan, mount it using tubes that go all the way through the tank, what could go wrong…!
Easy peasy lemon squeasy so far but now we need some sides, break out some engineering cardboard once again.
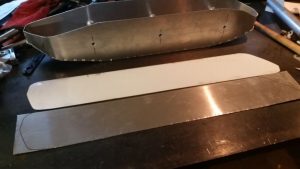
Just lay on a piece of cardboard too big, mark it out with a sharpie and trim to size.
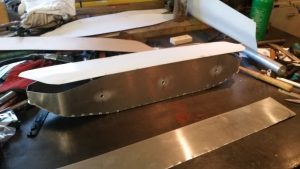
Transfer to aluminium sheet and trim with sheers.
Add some tack welds to hold it all in place, dont whatever you do weld up one side as it will distort more than you can imagine.
Starting to take shape, time to add the second side.
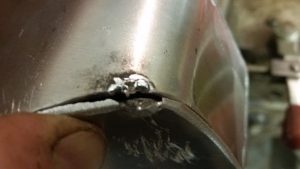
OK, so you can’t add the second side without somewhere for the heat to go or the weld just blows back at you and makes a mess, lesson learned..
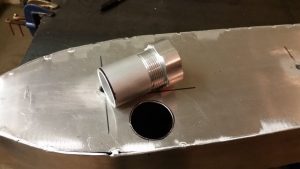
Cut a hole for the filler to allow the heat to escape, works wonders!
Once you are happy with the fit and shape you can seam weld it up and make a platform for the tank to sit on.
I made up a leather gasket to hopfully reduce vibration.
Time to make the mounting rods, I welded a drill in the end of a 8mm rod so I could drill at a distance, it was a bit of a wobbly process but it worked well.
Don’t look too bad, it’s mounted quite secure and it looks alright, fairly happy with how this came out, next time I make one I will use thicker sheet as 1.5mm is just a bit tricky to weld.
No I’m not going to paint it, just a pin stripe the same colour as the frame, Burgandy red.
Sarah’s Bike lives…….. or at least lived.
Cooperman popped round and over a couple of visits got the wiring complete and fired the old girl up …. and the Guzzi.
All was going well for a few turns of the key until a Fzzzzzt and pop from the starter and a plume of smoke suggested the demise of the only cranking aid to this old girl. – Have to wait til payday to find a replacement then …. see how she fairs at the bike show(?).
Making a start on Heisenburgs frame last night – only to find that the girders he’d bought left a little to be desired. Not one to shy away from a little bit of work he just shrugged his shoulders and decided to make some of his own using the originals as a pattern.
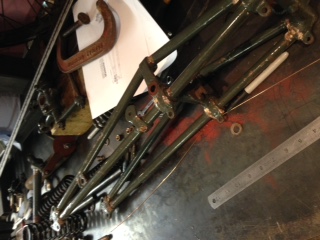
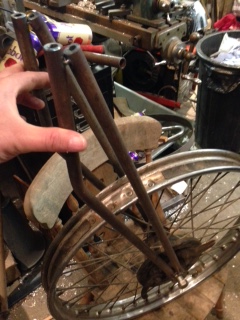
The girders I bought were nasty, no bushing and cheap castings, looks a bit brittle for my liking so a quick trip to see ozzy and score some materials on the cheap, I haven’t paid for this lot yet but it will be a fiver or some biscuits, it’s always a good deal.
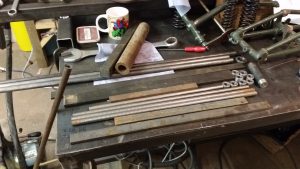
I turned the headstock out of the rusty peice of water pipe you see in the last picture and bought some bearings, oh…and some oil-lite bushing to keep it all rocking sweet, blown the budget a little though as now these girders are going to cost well over 20 quid… i was aiming at a fiver….such a dreamer.
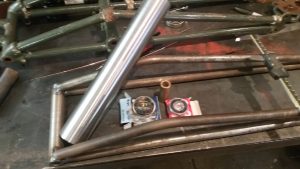
I’ll leave these now for a bit as I’m going to build the frame so I’ll wait to see what the ride height is, may aswell weld the pivots when we have more information. H
Found a little time to move forward with this project this week, made the mount for the spring. Found the spring attached to an old kart abandoned in the wood yard, as you do..
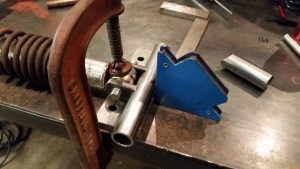
Eye’d it up for size and it’s a little tall but it’s all I have so it will do.
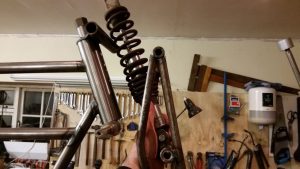
Whilst continuing my scavenging in the wood yard I came accross some ‘wood’, fairly common as it happens so I utilised this new material to produce some award winning girders!
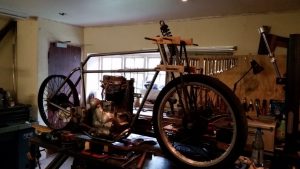
Turns out wood is actualy ‘5h1t’ as a building material for bikes so I moved on to a new material called ‘metal’, (not the same sort the Indians use…)!! Ok the wood was just to get an idea of scale, but a good idea as it’s really quick to do.
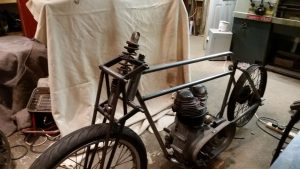
So now we have an idea of scale it’s obvious the spring is way to big and I don’t know how to cut one down so I have ordered one off ebay to suit a mountain bike, second hand unit with 230mm centres made by Marzocchi, looks like a retail price of over a ton so I’m happy at £35, got over an inch of adjustment too, be here in a few days.
I have ‘installed a lump of wood’ in place of the new shock for the time being, postie has been kind and sent me some new tyres, starting to look good, better than a certain Harley.. so I’m told! (by myself..)
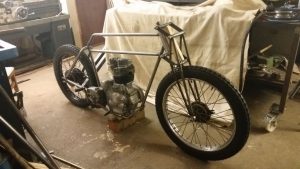
Winning a prize in the Brackley show has become somewhat of a competition between Harley and me, I am a bit worried that my efforts are all in vain as Mac rubs shoulders with all the right people, he is a ‘Hobnobber’, he knows all the winks, nudges, trouser shakes and secret hand signals needed to influence the judges decission, my chances are dire at best.. my only hope is a bribe to the right judge so I’m going to bring out the big guns, I have a bottle of 1986 sloe gin and a signed poster by Rick Astley and I’m not afraid to use them! Never gonna give you up, never gonna let you down, never gonna run around and desert you…..
” Beardy weirdy,” beardy bits”,” ban the beard,” Movember” “Death by beard”, these are all references to men’s facial fuzz which is increasingly popular and gives you the itches to look at. Apparently there’s more germs in a beard than on a toilet seat . If that wasn’t reason enough to shave then this following story may just have you reaching for the razor.
In 1567, an Austrian by the beard of Hans Steininger, had to escape from a fire which broke out in his house. He did what any man would do( bearded or otherwise) and ran for safety. Unfortunately his beard was so long he tripped on it. The resulting fall caused poor old Hans to break his neck and consequently burned to death. Now this should serve as a warning for all would be beard growers.
So viewers, do you recognise this man or women ?
I think it’s a cross between Walter White and Osama Bin Laden, what do you think????


